

Motorcycle Chest Protector Explained: Your Safety Guide

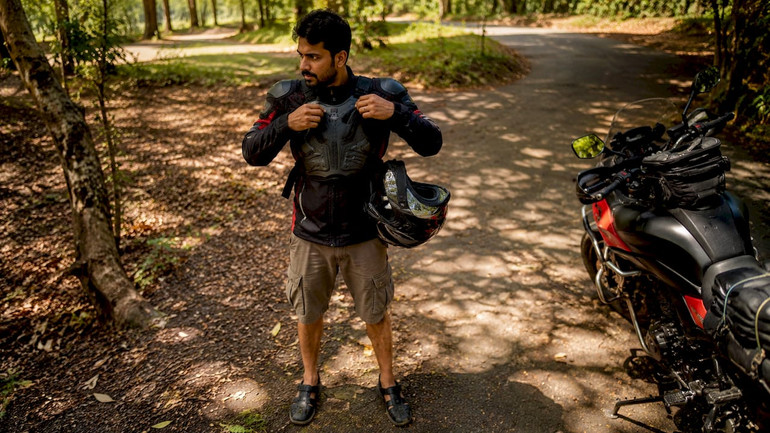
A motorcycle chest protector is protective gear designed to shield your vital chest, rib, and sternum areas from impact forces, flying debris, and roost during a crash or off-road ride. Think of it as the breastplate in your personal knight-of-the-asphalt armor set. Unlike a helmet, chest protection often gets skipped by riders who figure a jacket is “good enough.” Spoiler: it usually isn’t. With CE certification standards like EN 1621-3 setting clear impact thresholds, and modern materials making protectors lighter and more breathable than ever, there has never been a better time to get this part of your motorcycle safety gear explained properly.
What is a motorcycle chest protector and why does it matter?
A motorcycle chest protector is a wearable armor panel that covers your sternum, ribs, and sometimes your shoulders to absorb and disperse crash energy away from your vital organs. Chest protectors prevent not just severe injuries but also minor bumps, bruises, and roost damage, with typical coverage spanning the chest, back, and ribs. That coverage zone matters because your ribcage houses your heart, lungs, and major blood vessels. A direct impact without protection can crack ribs and drive bone fragments into soft tissue.
The industry term you will see on product labels and safety certifications is “thoracic protector,” governed by the EN 1621-3 standard. CE armor categories differ for limb protectors, back protectors, and chest protectors by standard, following EN 1621-1, EN 1621-2, and EN 1621-3 respectively. Knowing which standard applies to your gear tells you exactly what testing it passed. A jacket labeled “CE certified” without specifying EN 1621-3 for the chest panel may not include any chest protection at all.
What are the different types of motorcycle chest protectors?
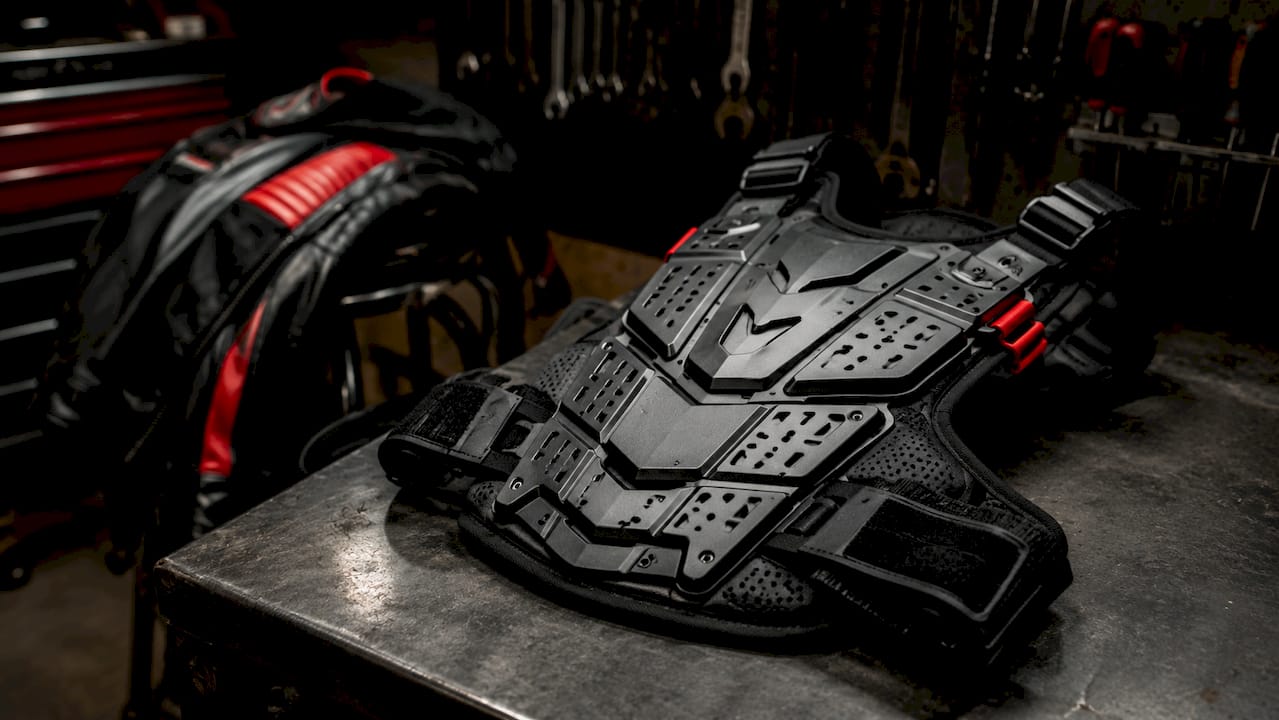
Chest protectors come in three main formats, and each one suits a different riding situation.
- Roost guards: Lightweight, vest-style shields designed primarily for motocross and off-road riding. They deflect rocks, dirt clods, and debris thrown up by other riders. Entry-level roost guards start around $60 for basic models, making them the most affordable entry point into chest protection.
- Standalone chest armor: Full-coverage protectors worn over or under your jersey or jacket. These offer the highest protection level and often meet CE Level 2 certification. Advanced CE Level 2 chest protectors typically range from $180 to $225.
- Integrated jacket armor: Chest armor inserts that slide into pockets sewn into your riding jacket. Jacket inserts often cost around $28 as standalone upgrades. The catch is that most motorcycle jackets include a foam back protector that is not CE rated, and the same applies to many chest pockets.
How do protectors actually work? The armor panel absorbs kinetic energy on impact and spreads the force across a wider surface area, reducing the peak pressure on any single point of your chest. Rigid outer shells crack or deform to absorb energy. Foam and viscoelastic inner layers cushion the remaining force before it reaches your body.
Pro Tip: If your jacket has a chest pocket but no insert, check whether it accepts EN 1621-3 certified armor. A $28 upgrade can be the difference between bruised ribs and broken ones.
What do CE armor certification levels mean for chest protectors?
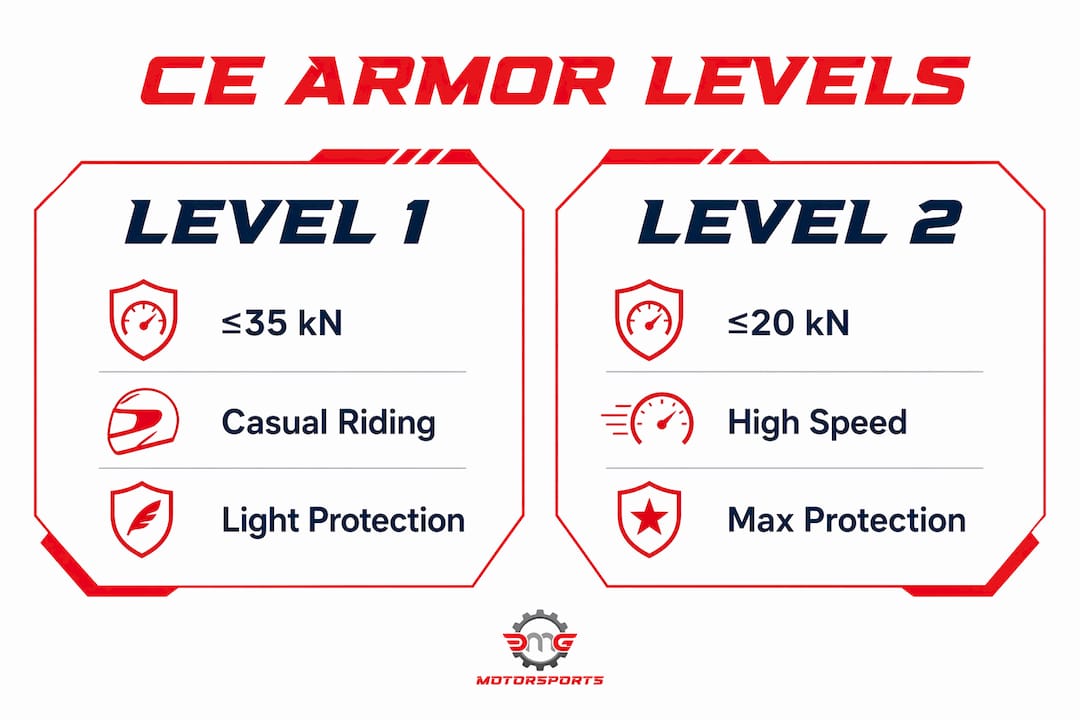
CE certification is the clearest, most standardized way to compare chest protector quality. The EN 1621-3 standard tests how much impact force a protector transmits to your body. Less force transmitted equals better protection.
| CE Level | Max Force Transmitted | Best For |
|---|---|---|
| Level 1 | ≤35 kN average | Casual street riding, low-speed commuting |
| Level 2 | ≤20 kN average | High-speed riding, aggressive off-road, track days |
Level 2 CE armor transmits an average impact force of no more than 20 kN, compared to Level 1’s ceiling of 35 kN. That gap is not trivial. At highway speeds, the difference between those two thresholds can determine whether you walk away with bruised ribs or a punctured lung.
Level 2 armor is recommended for riders who frequently ride at high speeds, carry heavier loads, or tackle unfamiliar terrain. Level 1 is a reasonable choice for low-speed urban commuting where crash forces are lower. The mistake most riders make is assuming any CE label means maximum protection. It does not. Always check the level number and the specific EN standard on the label.
One common misconception is that a higher-rated protector is always the right call. Level 2 is thicker and less breathable, which can cause fatigue and overheating on long summer rides. A protector you take off because it is too hot provides zero protection. Fit and retention matter just as much as the certification number. A CE Level 2 protector is only effective if it stays properly positioned over your chest during a crash.
Pro Tip: Check the label inside any protector for both the EN standard number and the CE level. If you see only “CE certified” with no level number, treat it as unrated until you can verify the spec.
How do modern materials improve chest protector performance?
The biggest leap in chest protector technology over the past decade is viscoelastic impact material. These materials stay soft and flexible while you ride, then harden almost instantly on impact to spread crash forces. Viscoelastic materials like D3O and RE ZRO remain flexible during normal movement and harden upon impact, offering protection without restricting your reach or twist on the bike.
Modern protectors combine these smart materials with lightweight structural frameworks. Here is what to look for in a high-performance chest protector:
- Viscoelastic impact foam (D3O, RE ZRO): Stays pliable during riding and stiffens on impact. Thinner and lighter than traditional hard-shell armor at equivalent protection levels.
- Breathable chassis construction: Open-cell foam and perforated panels allow airflow across your chest, reducing heat buildup on long rides.
- Aviation-grade materials like Hexprene™: Honeycomb-structured panels that are rigid enough to deflect debris but light enough to forget you are wearing them.
- Dual adjustment systems: Some chest protectors offer dual adjustment points for a secure fit that stays locked and centered throughout movement, which maintains full range of motion while keeping armor coverage in place.
The practical result of these advances is that a modern CE Level 2 protector can weigh less and breathe better than a CE Level 1 protector from five years ago. You no longer have to choose between protection and comfort the way earlier riders did.
How to choose the right chest protector for your riding style
Choosing the right chest protector comes down to four factors: riding style, climate, fit, and budget. Work through each one before you buy.
-
Assess your riding style and risk level. Motocross and enduro riders face constant roost and debris, so a standalone CE Level 2 protector is the baseline. Street riders doing highway miles need Level 2 for crash force protection. Urban commuters at lower speeds can reasonably start with Level 1 and upgrade later.
-
Factor in your climate. Hot, humid riding conditions push you toward lighter, more breathable Level 1 or advanced viscoelastic Level 2 designs. The most important gear is the gear you will wear every time. A Level 2 protector sitting in your garage because it is too hot is not protecting anyone.
-
Prioritize fit above everything else. A protector that shifts during a crash leaves your sternum exposed at the worst possible moment. Look for adjustable shoulder straps, waist belts, and dual adjustment points. Try it on while seated in your riding position, not just standing upright. Check that the panel sits centered on your sternum and does not ride up when you reach forward.
-
Set a realistic budget. Entry-level roost guards start around $60. Full CE Level 2 standalone protectors run $180–$225. Jacket armor inserts are the most affordable upgrade at roughly $28. For beginner riders building out their gear kit, a certified jacket insert is a smart first step before investing in a full standalone protector.
Pro Tip: Always try a chest protector on while sitting in your riding position. A protector that fits perfectly standing up can gap away from your chest the moment you lean forward on the bars.
Key Takeaways
A properly fitted CE Level 2 chest protector is the single most effective upgrade most riders can make to their existing gear setup.
| Point | Details |
|---|---|
| CE Level 2 outperforms Level 1 | Level 2 transmits no more than 20 kN versus 35 kN for Level 1, a significant safety gap. |
| Most jacket foam is not CE rated | Upgrading to a certified EN 1621-3 insert is a low-cost improvement with real injury prevention value. |
| Fit determines effectiveness | A protector that shifts during a crash leaves vital areas exposed, making retention features non-negotiable. |
| Modern materials solve the bulk problem | Viscoelastic foams like D3O deliver Level 2 protection in lighter, more breathable designs than older hard-shell armor. |
| Match protection level to riding conditions | Level 2 suits high-speed and aggressive riding; Level 1 works for low-speed urban commuting where crash forces are lower. |
Why I think most riders underestimate chest protection
Riders obsess over helmets, and rightly so. But chest protection gets treated like an optional accessory, and that attitude does not match the physics of a crash. Your chest is a dense cluster of organs with no natural crumple zone. Your skull at least has a helmet. Your sternum has whatever you put in front of it.
What changed my thinking was seeing how much proper motorcycle gear has evolved in the last few years. The old argument against chest protectors was that they were hot, stiff, and uncomfortable. That argument is mostly dead now. Viscoelastic materials and breathable chassis designs have removed the bulk penalty. You can wear a CE Level 2 protector on a summer ride and barely notice it is there.
My honest advice is to stop treating chest armor as a motocross-only item. Street riders crash too, often at higher speeds than off-road riders. And when you do go down on pavement, you want every layer of certified protection between your ribs and the road. Inspect your gear regularly, check that inserts are still in their pockets, and replace anything that has taken a hard impact. Armor that has already absorbed a crash is compromised, even if it looks fine. Pair your chest protector with a GPS safety device so someone can find you fast if the worst happens. That combination of physical protection and connectivity is the closest thing to a real-world safety net a rider can build.
— Bryan
Gear up with Dmgmotorsports
Dmgmotorsports carries a full selection of motorcycle safety gear including CE-certified chest protectors, jacket armor inserts, and full-coverage standalone protectors for every riding style. Whether you are a weekend trail rider looking for a solid roost guard or a street rider ready to upgrade to a CE Level 2 thoracic protector, the catalog covers the full range from entry-level to advanced.
Every protector in the Dmgmotorsports lineup is sourced from brands that meet or exceed EN 1621-3 certification standards. The team is available to help you match the right protection level to your riding conditions, budget, and jacket setup. Visit Dmgmotorsports to browse the current selection and get your chest protection sorted before your next ride.
FAQ
What is a motorcycle chest protector?
A motorcycle chest protector is a CE-certified armor panel that covers your sternum, ribs, and chest to absorb and disperse impact forces during a crash. It follows the EN 1621-3 standard for thoracic protection.
What is the difference between CE Level 1 and Level 2 chest armor?
CE Level 2 transmits a maximum average impact force of 20 kN, while Level 1 allows up to 35 kN. Level 2 offers significantly better protection and is recommended for high-speed or aggressive riding.
Do I need a chest protector if my jacket already has armor?
Most riding jackets include foam chest padding that is not CE rated under EN 1621-3. Upgrading to a certified insert or standalone protector provides measurably better impact protection.
How do I know if my chest protector fits correctly?
Put it on and sit in your riding position. The panel should stay centered over your sternum without shifting or gapping when you reach forward. Adjustable straps and dual adjustment points help lock the protector in place.
How often should I replace my chest protector?
Replace any chest protector that has absorbed a significant impact, even if it looks undamaged. Viscoelastic and foam materials lose their energy-absorbing properties after a hard hit and will not perform the same way in a second crash.
Recommended
- Staying Safe and Stylish on the Track: The Importance of Proper Motorcycle Gear - DMG Motorsports
- Motorcycle Helmet Safety Ratings Explained — DOT vs ECE vs Snell vs FIM (2026 Guide) - DMG Motorsports
- Best Motorcycle Helmets of 2025 (Beginner to Pro Riders) - DMG Motorsports
- 6 Top Beginner Motorcycle Accessories for New Riders - DMG Motorsports